Home » Unlabelled » Photoshop Adjustments For Ink Drawings - Tutorial How To Clean Up An Ink Drawing In Photoshop Paths Peculiar : A hard ink brush for lineart drawings.
Photoshop Adjustments For Ink Drawings - Tutorial How To Clean Up An Ink Drawing In Photoshop Paths Peculiar : A hard ink brush for lineart drawings.. Layer 3 layer 4 adjustment layer i need to get rid of the actual adjustment layer but apply the effect to layer 1 & 2 (but also not merge layer 1 & 2 together). Working with adjustment layers in adobe photoshop to edit your images can make your design life simpler and more efficient. All photoshop color adjustment tools work essentially the same way; The hue/saturation adjustment impacts different colors in your image equally. Today's photoshop brushes are for achieving the traditional ink painting effect.
This will be a quick tutorial on how to use photoshop to clean up a photo (i don't have a scanner) of an ink drawing and make it look good for publishing on social while i use photoshop for this tutorial, i'm sure there are many similar programs that can be used to the same purpose. Adjustment layers apply color and tonal adjustments to your image or photo without permanently changing pixel values. A photoshop adjustment layer is an effect/adjustment added to a layer that is an independent layer. Go to layer > new adjustment layer > curves to create a new curves adjustment using this modern ink photoshop action, you can convert your photo to an ink drawing quickly and easily! For graphite drawings, charcoal drawings, figure drawings and the like, you can take a photo of it like normal but i can also suggest an alternative.
Color Separations In Photoshop With 2 Ink Colors Christine Larsen from images.squarespace-cdn.com Adobe photoshop is by far the most popular software for painting. 2choose image→adjustments→threshold from the menu bar. Simply open your photo, brush over. I know you can basically do. Enroll in photoshop beginner's course before completing this tutorial to get more familiar with the program. This will turn your image into black and white. A risd graduate i knew photographed figure drawings by placing on a window in a dimly lit area and adding a diffused light source from the back. Photoshop and adjustment layers allow you to dial in your own custom looks and style.
Ink can take a lot of forms and that's why the variety in this pack can be so useful.
Especially for artists who prefer working in ink. 1open a line drawing in photoshop. 2choose image→adjustments→threshold from the menu bar. Be careful using this tool as adjusting everything together can make already colorful sections of the. That means that when we apply a color adjustment for example, the effect doesn't get rasterize along with the respective layer/image. This will be especially useful with more complicated files or intricate. Color adjustment tools and their option settings are accessed in the adjustments panel. Layer 3 layer 4 adjustment layer i need to get rid of the actual adjustment layer but apply the effect to layer 1 & 2 (but also not merge layer 1 & 2 together). Conversely, you can fill the mask with black, then paint an area with white to reveal it for adjustment. The threshold dialog box includes a chart called a histogram. Enroll in photoshop beginner's course before completing this tutorial to get more familiar with the program. Go to layer > new adjustment layer > curves to create a new curves adjustment using this modern ink photoshop action, you can convert your photo to an ink drawing quickly and easily! This will turn your image into black and white.
A hard ink brush for lineart drawings. Adjustment layers can be added to an image to apply color and tonal adjustments without permanently changing the pixel values in the image. For this week's free photoshop technique, lynda.com author deke mcclelland takes an ordinary photo, applies several filters (two of which he claims to. What is an adjustment layer? In this first video of a series of 3 for digital drawing, i explain the inking step by step.
Ink Art Manipulation Photoshop Action By Mrikhokon Graphicriver from s3.envato.com At this price, it is one of the most comprehensive brush packs you can find. The difference between the tools is the amount of control they provide. A hard ink brush for lineart drawings. Photoshop calls these commands image adjustments, and we can find them all grouped together in one convenient location by going up to the image menu at the top of the screen and. For graphite drawings, charcoal drawings, figure drawings and the like, you can take a photo of it like normal but i can also suggest an alternative. Photoshop and adjustment layers allow you to dial in your own custom looks and style. 1open a line drawing in photoshop. Adobe photoshop is by far the most popular software for painting.
I really like the energy of traditional ink sketches and paintings, so i thought it would be fun to create some brushes that mimic that effect.
Your photos are going to look. I really like the energy of traditional ink sketches and paintings, so i thought it would be fun to create some brushes that mimic that effect. For this example, we made two change to the ink drawing file at this point, the levels adjustment we created earlier to add contrast to the ink drawing is making things too dark. Simply open your photo, brush over. 2choose image→adjustments→threshold from the menu bar. This will be a quick tutorial on how to use photoshop to clean up a photo (i don't have a scanner) of an ink drawing and make it look good for publishing on social while i use photoshop for this tutorial, i'm sure there are many similar programs that can be used to the same purpose. Be careful using this tool as adjusting everything together can make already colorful sections of the. A risd graduate i knew photographed figure drawings by placing on a window in a dimly lit area and adding a diffused light source from the back. .photo, applies several filters (two of which he claims to never use under any other circumstances), and transforms the photo into an ink drawing. A smooth inker for drawing drafts and subtle details. Working with adjustment layers in adobe photoshop to edit your images can make your design life simpler and more efficient. Adjustment layers apply color and tonal adjustments to your image or photo without permanently changing pixel values. For graphite drawings, charcoal drawings, figure drawings and the like, you can take a photo of it like normal but i can also suggest an alternative.
Photoshop calls these commands image adjustments, and we can find them all grouped together in one convenient location by going up to the image menu at the top of the screen and. Ink can take a lot of forms and that's why the variety in this pack can be so useful. All photoshop color adjustment tools work essentially the same way; Changing a single particular color is easily done in capture one, but it can prove to be a little bit more complicated in photoshop. Home » photoshop tutorials » photoshop effects » how to select and change colors in in this photoshop tutorial, we'll learn all about the color replacement tool (nested under the brush tool) you can use the hue/saturation adjustment layer to change the color of an object by first making a.
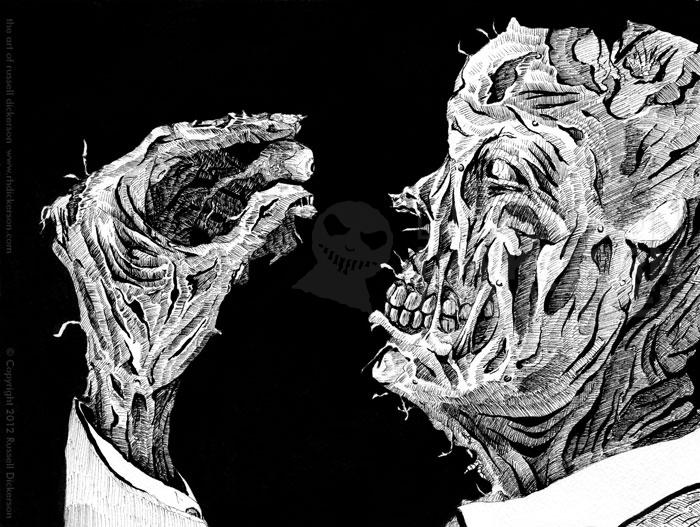
New Ink Art And Walkthrough The Revenant The Many Words Of Russell Dickerson from www.rhdickerson.com This will be a quick tutorial on how to use photoshop to clean up a photo (i don't have a scanner) of an ink drawing and make it look good for publishing on social while i use photoshop for this tutorial, i'm sure there are many similar programs that can be used to the same purpose. Photoshop calls these commands image adjustments, and we can find them all grouped together in one convenient location by going up to the image menu at the top of the screen and. I really like the energy of traditional ink sketches and paintings, so i thought it would be fun to create some brushes that mimic that effect. In this section, we are going to make final adjustments to the design. A hard ink brush for lineart drawings. Now, to turn the ink drawing into a penciled effect. Working as a graphic designer for more than nine years, whenever i design a poster and work with text in photoshop, i adjust the spacing letters. What is an adjustment layer?
Not only can you get an image exactly how you want it, you can copy learn how rgb color channels work within photoshop and how to adjust them using the color channel mixer adjustment layer in photoshop.
Be careful using this tool as adjusting everything together can make already colorful sections of the. Enroll in photoshop beginner's course before completing this tutorial to get more familiar with the program. Photoshop calls these commands image adjustments, and we can find them all grouped together in one convenient location by going up to the image menu at the top of the screen and. 2choose image→adjustments→threshold from the menu bar. Then, create a new hue and saturation adjustment layer and pick a channel that isn't on the current picture or one that isn't too close to the color you want to target. Adjustment layers can be added to an image to apply color and tonal adjustments without permanently changing the pixel values in the image. Working with adjustment layers in adobe photoshop to edit your images can make your design life simpler and more efficient. Adobe photoshop is by far the most popular software for painting. The hue/saturation adjustment impacts different colors in your image equally. Working as a graphic designer for more than nine years, whenever i design a poster and work with text in photoshop, i adjust the spacing letters. Go to layer > new adjustment layer > curves to create a new curves adjustment using this modern ink photoshop action, you can convert your photo to an ink drawing quickly and easily! Conversely, you can fill the mask with black, then paint an area with white to reveal it for adjustment. In photoshop, you can affect the luminosity of each color channel by creating a black and white adjustment layer, setting the blending mode to color.
Disclaimer: Gambar, artikel ataupun video yang ada di web ini terkadang berasal dari berbagai sumber media lain. Hak Cipta sepenuhnya dipegang oleh sumber tersebut. Jika ada masalah terkait hal ini, Anda dapat menghubungi kami disini.

 Step by ... - My original pictures of sport cars and classic cars, can be found all around the world:")


Posting Komentar